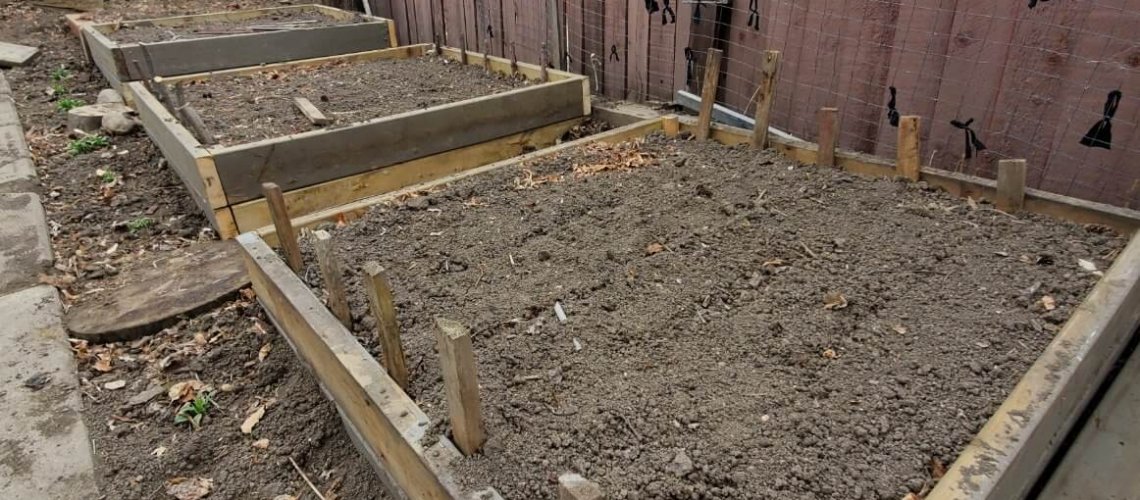
Dig a well before you are thirsty is an old Arabic saying. Build and prepare your beds and soil before you start your spring garden. (FYI: 6” = 15 cm. 8” = 20 cm. 16” = 40 cm)
While each plant thrives best on its unique needs, most urban gardeners are best off using a generic soil in which vegetables and flowers will grow satisfactorily, especially when you rotate crops. Start by creating a 16-inch depth of soil. This starts with double digging. Dig two shovels down, throwing the top layer to one side and the bottom layer to the other side. Then place the top layer on the bottom of the trench. Add a generous layer of compost. Then place the bottom layer of the second trench on top of the trench. Continue across your garden bed. Add more compost to maintain its fertility every year.
Ideally, there should be at least 16 inches of soil. The deeper the soil, the more room your plants have to grow. They grow longer roots than those planted in the traditional 8” depth of soil. Longer roots result in larger vegetables. Plants grown in healthy soil are less likely to attract pests.
There is a simpler method. Consider raised beds. Raised beds have four main advantages over the traditional garden. First, you only walk on the path between the beds, thereby avoiding compacting the soil where your plants are growing. Compacted soil reduces the amount of air and water in the voids between soil particles, and the result is stunted plant growth and smaller vegetables. Second, because of limited soil compaction, you can use a no-till method of gardening. Thirdly, you can weed and thin at any time, even when it is has rained. Fourthly, it is easier to plan crop rotation.
I use a simple method of constructing my raised beds. I use two levels of 2” x 8” untreated lumber, giving a depth of up to 16” plus the soil below the raised bed. The boards are simply screwed together, using 3 ½” wood screws. A four-foot width of each raised bed allows for easy weeding. The length of the bed will vary depending on the location. I provide a 16” wide path between each raised bed.
Once the raised bed is in place, loosen the soil below the bottom of the raised bed to make it easier for the plant roots to work their way down. Then add soil, alternating with generous layers of compost, kitchen scraps, grass and leaves until the bed is filled. After a rain, collect earthworms and add them to the mixture. If the raised bed is placed on grass, start with a layer of cardboard.
No-till is simple and easy with raised beds. You need to only dig once every few years, loosening the soil with a broad fork. In my case, I only do it for the brassica bed as these plants do not use the microorganisms in the soil. The reason for no-till is that there are many beneficial organisms in the soil that have a symbiotic relationship with plants, helping both to thrive. These include microscopic fungi, bacteria, protozoa, earthworms, and other critters. Digging kills many of them.
The combination of raised beds and no-till has reduced my preparing and planting time by at least 50%.
The best compost is the compost you create yourself. Test compost from a local source, private or public, before you add it to your soil. I once used compost with a high salt content that killed my seedlings. The easiest way to make compost is to build a large container into which you put all your organic material, including kitchen scraps. I let the material decompose for a year and then incorporate it into my soil. You can find many other ways to create compost on the internet.
If you use manure, only use horse or sheep manure; cow manure has far too many weed seeds.

Recent Comments